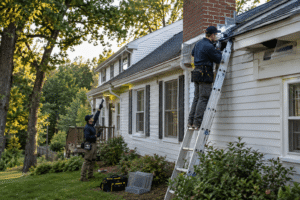
Painting an older home is more than choosing a new color and applying it to the walls. Aging surfaces can have layers of old paint, small cracks, uneven textures, moisture issues, damaged trim, and architectural details that require careful attention. The best approach to interior painting for older homes is to inspect and prepare the surfaces thoroughly before applying new paint. If you are working with an Interior and exterior painting company in Sparkill, discussing the home’s age, existing surfaces, previous repairs, and any known issues can help establish an appropriate preparation and painting plan.
Why Older Homes Need Special Painting Preparation
Older houses often have character that newer construction does not. Wood trim, decorative moldings, plaster walls, built-in features, paneled doors, and other architectural elements can contribute significantly to the home’s appearance. However, these features may also require more careful preparation than modern drywall.
Over time, walls and ceilings can develop dents, nail holes, hairline cracks, peeling paint, stains, or areas where previous coatings have failed. Simply painting over these problems can leave them visible and may cause the new finish to look uneven.
A professional painting project should therefore begin with an evaluation of the existing surfaces. Identifying the condition of the walls, trim, doors, ceilings, and other painted areas helps determine which surfaces need cleaning, sanding, patching, priming, or more extensive repair.
Inspect the Walls Before Painting
A detailed inspection is one of the most important steps when preparing an older home for interior painting. Look for loose or peeling paint, cracks, discoloration, water stains, soft areas, and signs of previous patching.
Plaster walls deserve particular attention. Unlike modern drywall, plaster can have an irregular surface and may develop cracks as a home settles over time. Small cosmetic cracks can sometimes be repaired as part of surface preparation, but larger or recurring cracks may indicate an underlying issue that should be evaluated before painting.
Water stains also deserve attention. Painting directly over a stain without addressing its source can lead to recurring discoloration or coating failure. If moisture has affected a wall or ceiling, determine where it is coming from and make necessary repairs before beginning the painting process.
Be Careful With Older Paint
One of the most important considerations in older homes is the possibility of lead-based paint. In the United States, homes built before 1978 may contain lead-based paint. Disturbing old painted surfaces through aggressive sanding, scraping, or renovation can create hazardous dust.
Homeowners should not assume that old paint is safe simply because it appears intact. If lead-based paint may be present, appropriate testing and lead-safe work practices should be considered before disturbing the coating.
The goal is not always to remove every layer of old paint. Depending on the surface and condition of the existing coating, a safer and more practical approach may involve stabilizing sound surfaces, carefully preparing problem areas, and applying compatible coatings.
Clean Surfaces Before Applying Paint
Paint adheres best to surfaces that are clean, dry, and properly prepared. Older homes can accumulate years of dust, household residue, grease, and grime, particularly around kitchens, doorways, baseboards, and high-touch areas.
Cleaning should be appropriate for the surface being treated. Overly aggressive cleaning can damage delicate plaster, old woodwork, or existing finishes. Once cleaned, surfaces should be allowed to dry completely before patching, priming, or painting.
This step may seem simple, but inadequate cleaning can contribute to poor adhesion and an inconsistent final appearance.
Repair Cracks, Holes, and Surface Damage
A fresh coat of paint cannot hide every surface defect. In fact, new paint can make imperfections more noticeable because changes in sheen and color may highlight uneven areas.
Small nail holes and minor surface imperfections can generally be filled and smoothed before painting. Cracks should be assessed to determine whether they are merely cosmetic or potentially related to movement, moisture, or another underlying problem.
When repairing older plaster or wood, the repair material should be appropriate for the substrate. Rushing through repairs or using incompatible materials can create visible patches that become apparent after painting.
Pay Attention to Trim and Woodwork
Older homes often contain detailed wood trim that adds substantial character. Baseboards, window casings, doors, crown molding, stair components, and built-in cabinetry may have accumulated multiple layers of paint.
Rather than automatically replacing or aggressively stripping these elements, consider whether the existing woodwork can be repaired and refinished. Minor dents, holes, worn edges, and damaged sections may need attention before a new coating is applied.
Preserving architectural details can help maintain the visual character of an older property while giving the interior a cleaner, more updated appearance.
Choose the Right Primer
Primer can be especially useful when painting older surfaces because different areas may have different levels of porosity, staining, or previous coating. A suitable primer can help create a more uniform surface and provide a better foundation for the finish coat.
Primer selection should depend on the substrate and the condition of the existing coating. Stained surfaces, repaired areas, bare wood, and certain previously painted surfaces may require different preparation or priming approaches.
It is also important to avoid assuming that one primer is appropriate for every surface in an older home. A professional assessment can help determine where primer is necessary and which type is compatible with the existing materials.
Select Colors That Complement the Home
Color selection is another important part of interior painting tips for older homes. A modern color can refresh an older interior, but the best choice often depends on the home’s architecture, natural light, flooring, woodwork, and existing finishes.
Neutral colors can create a clean and timeless appearance, while carefully selected deeper tones can emphasize architectural details. If the home has original woodwork that you want to highlight, consider how the wall color will interact with the wood’s natural tone.
It can also be useful to test paint samples in different areas of a room. Natural daylight, artificial lighting, and the surrounding finishes can all influence how a color appears throughout the day.
Consider Moisture and Ventilation
Older homes may have areas that are more vulnerable to condensation or moisture, particularly bathrooms, kitchens, basements, and rooms with limited ventilation.
Before painting, identify signs such as recurring stains, peeling coatings, mildew-like growth, or damp surfaces. These conditions should be addressed before applying new paint. Otherwise, the new coating may not perform as expected.
Improving ventilation where appropriate can also help maintain painted surfaces over time. Painting should be viewed as part of broader property maintenance rather than a substitute for resolving moisture problems.
Work With a Contractor Who Understands Older Properties
Choosing a contractor for an older home involves more than comparing paint colors. The contractor should understand that surface preparation, existing materials, architectural details, and the home’s condition can influence the painting process.
For homeowners comparing local options, an Interior and exterior painting company in Kaser may be considered when the project involves both interior and exterior surfaces. The important consideration is whether the contractor takes time to evaluate the property, communicate preparation requirements, protect surrounding areas, and explain how existing surface conditions may affect the work.
Before work begins, discuss which rooms and surfaces will be painted, what preparation is expected, how delicate architectural features will be protected, and whether any areas require repair before painting.
Protect Floors, Fixtures, and Architectural Details
Older homes often contain original flooring, hardware, cabinetry, windows, and decorative elements that deserve protection during painting.
Furniture should be moved or covered, floors should be protected appropriately, and fixtures should be shielded from accidental splatter. Delicate trim and architectural features may require additional care during preparation and application.
Good preparation also includes creating clean transitions around doors, windows, baseboards, ceilings, and other adjoining surfaces. Taking time to protect these areas can contribute significantly to the overall quality of the finished project.
Allow Enough Time for Proper Preparation
One of the biggest mistakes homeowners can make is treating preparation as an inconvenience rather than an essential part of painting. In an older home, preparation can involve cleaning, scraping loose material, patching imperfections, sanding appropriate areas, priming, and allowing repaired surfaces to dry.
The exact process depends on the condition and construction of the property. A room with well-maintained drywall may require relatively straightforward preparation, while an older room with damaged plaster and multiple previous coatings may require considerably more attention.
A slower preparation process can be worthwhile because the final appearance depends heavily on the condition of the surface underneath the paint.
Frequently Asked Questions About Painting Older Homes
Should I remove all the old paint before repainting?
Not necessarily. Whether old paint should be removed depends on its condition, the substrate, the type of existing coating, and whether hazardous materials such as lead-based paint may be present. Sound coatings can sometimes be prepared and repainted without complete removal.
How do I prepare old plaster walls for painting?
Inspect the plaster for cracks, loose areas, stains, and previous repairs. Clean the surface, repair appropriate imperfections, allow repairs to dry, and use a suitable primer where necessary. Larger or recurring cracks should be evaluated before cosmetic painting begins.
Is primer necessary when painting an older house?
Primer is not automatically required for every surface, but it can be valuable on repaired areas, stained surfaces, bare substrates, and other areas where improved adhesion or uniformity is needed. The appropriate approach depends on the existing surface and the new coating.
What should I do if I suspect lead paint?
Avoid disturbing the coating through uncontrolled sanding or scraping. If lead-based paint may be present, consider appropriate testing and lead-safe procedures before beginning work. Older homes should be approached carefully when existing coatings are unknown.
Conclusion
Interior painting can give an older home a refreshed appearance while preserving the features that make the property distinctive. The most important steps are careful inspection, appropriate surface preparation, attention to moisture, responsible handling of older coatings, suitable primer selection, and thoughtful color choices. Rather than rushing directly to the paint application, homeowners should first understand the condition of the surfaces and address problems that could affect the finished result. Whether planning the work independently or consulting professionals such as JLL Paintings, a preparation-first approach can help create a cleaner, more durable, and visually appealing interior while respecting the character of an older home.