Buying a wood-burning fireplace brings incredible warmth to your home during cold winter months, but it also comes with essential maintenance responsibilities. Many homeowners wonder if they can handle seasonal maintenance independently or if hiring a certified sweep is always mandatory. Understanding Extreme Chimney Cleaning & Repair helps you evaluate whether a basic DIY brush pass will clear your flue or if dangerous creosote buildup demands specialized equipment and professional intervention.
Understanding the Risks of Chimney Maintenance
Operating a wood-burning appliance generates combustion byproducts that travel up your flue structure. Over time, these residues settle on the interior walls of your chimney liner, creating structural risks and severe fire hazards if left unaddressed.
The Science Behind Creosote Accumulation
When wood burns, it releases unburned gases, smoke, water vapor, and tar fog. As these substances cool while rising through the chimney, they condense onto the interior masonry or metal walls. This condensation forms creosote, an extremely flammable byproduct that comes in three distinct stages:
-
Stage 1 Creosote: A flaky, soot-like powder that is easily brushed away with basic sweeping tools.
-
Stage 2 Creosote: A dark, shiny, sticky residue resembling hard tar that requires heavy-duty scraping or chemical treatment.
-
Stage 3 Creosote: A hardened, glazed coat of solid fuel that coats the flue interior. It is highly concentrated, extremely flammable, and almost impossible to remove without commercial mechanical rotary tools.
Fire Hazards and Structural Deterioration
Ignoring creosote buildup creates the perfect environment for a destructive chimney fire. Chimney fires can burn at temperatures exceeding 2,000 degrees Fahrenheit, which easily cracks clay flue tiles, melts metal liners, and ignites nearby wooden framing within your home’s walls. Additionally, acidic soot eats away at mortar joints from the inside out, leading to structural collapse or deadly carbon monoxide leaks into your living space.
DIY Chimney Cleaning: Tools, Prep, and Step-by-Step Instructions
If your chimney inspection reveals only light, Stage 1 soot, taking a hands-on approach is completely feasible. DIY sweeping requires proper preparation, correct equipment, and strict attention to safety protocols.
Essential Equipment for DIY Sweeping
Before attempting to clean your flue, assemble the right gear. Standard household tools will not suffice and can damage your chimney liner.
-
Polypropylene or Wire Chimney Brushes: Matched exactly to the interior dimensions and shape of your flue (round, square, or rectangular).
-
Flexible Extension Rods: Threaded fiberglass rods that connect to your brush to reach the entire height of the chimney.
-
HEPA Vacuum Cleaner: Standard shop vacuums will blow ultra-fine soot particles back into your room’s air.
-
Personal Protective Equipment (PPE): N95 dust mask or respirator, safety goggles, heavy work gloves, and protective clothing.
-
Drop Cloths and Blue Painter’s Tape: Heavy plastic sheets to seal off the fireplace opening inside your house.
Step 1: Room Preparation and Sealing
Clear a six-foot area around your fireplace hearth. Cover surrounding furniture and flooring with canvas drop cloths. Open the damper completely and use plastic sheeting securely taped across the entire fireplace opening to prevent fine black dust from escaping into your living space while sweeping.
Step 2: Selecting Your Cleaning Method
Homeowners generally choose between two primary cleaning directions depending on roof pitch, comfort with heights, and flue design.
-
Top-Down Method: Done from the roof. You push the brush down from the top opening down to the hearth. This method uses gravity effectively but carries roof safety risks.
-
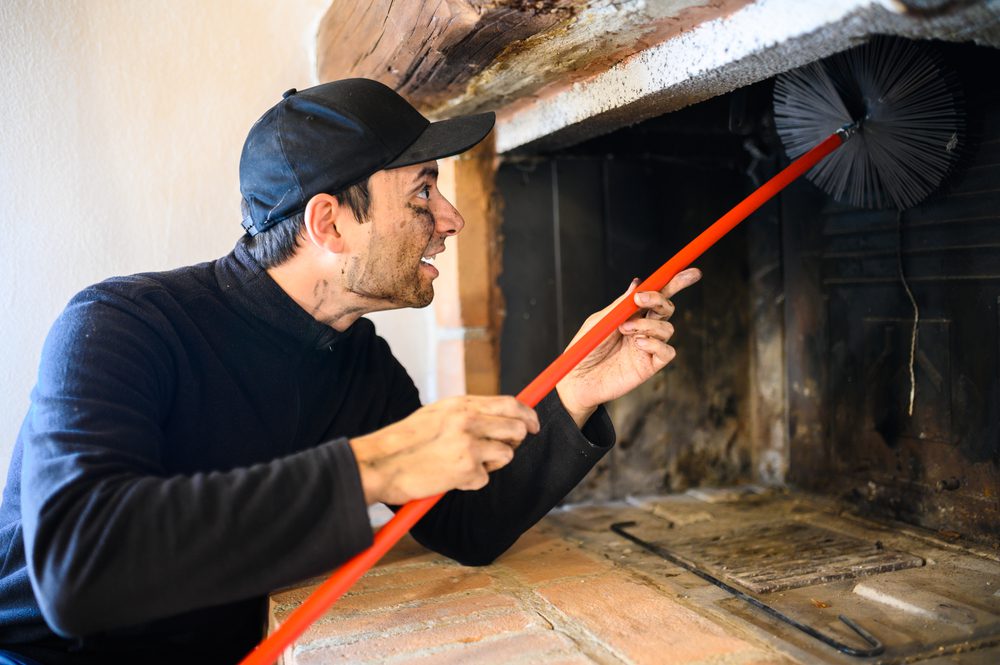
Bottom-Up Method: Executed standing comfortably inside your home. You insert the brush through the hearth opening and push it upwards by adding flexible rod segments one by one.
Step 3: Brushing the Flue Passages
Whichever entry point you choose, scrub the interior walls using firm, vertical up-and-down strokes. Pass the brush multiple times over every section of the flue until you no longer hear or feel gritty friction against the liner walls.
Step 4: Clearing the Smoke Shelf and Hearth
Soot and debris will accumulate on the smoke shelf (the horizontal ledge behind the damper) and on the floor of the firebox. Carefully peel back a corner of your plastic barrier, insert your HEPA vacuum hose, and thoroughly vacuum out all fallen debris. Avoid disturbing the soot dust manually to keep your home clean.
Evaluating DIY Cleaning Against Professional Sweeping
Deciding whether to take on this task yourself depends on several practical factors, including safety, equipment costs, and structural complexity.
| Feature / Factor | DIY Chimney Cleaning | Professional Chimney Sweep |
|---|---|---|
| Primary Suitability | Light Stage 1 creosote and annual soot maintenance | All stages of creosote, heavy glazing, and structural repair |
| Tool Investment | $80 – $180 (One-time equipment purchase) | $150 – $350+ (Per annual inspection & sweeping service) |
| Inspection Level | Basic visual check with a flashlight | Level 1, 2, or 3 NFPA inspection (includes video flue camera analysis) |
| Safety Risks | Fall risks from roof, dust inhalation, missed structural defects | Handled by trained technicians with full safety rigging |
| Time Required | 2 to 4 hours (including setup and cleanup) | 45 to 90 minutes |
| Creosote Capabilities | Removes loose powder soot only | Removes hardened Stage 2 and glazed Stage 3 creosote |
The comparison table above highlights how DIY methods handle light seasonal dust, whereas certified professionals bring specialized diagnostics and tools for severe buildup.
When Professional Help Becomes Essential
While routine maintenance can be tackled at home, certain conditions make professional intervention mandatory for home safety.
Removing Glazed Stage 3 Creosote
If you look into your flue and see a smooth, shiny, tar-like coating, stop immediately. Standard manual wire brushes cannot remove glazed Stage 3 creosote. Professional technicians use specialized chemical solvents to break down the hardened glaze before employing high-speed mechanical whip systems to scrub the liner clean without damaging the surrounding masonry.
Identifying Hidden Structural Damage
A clean chimney is not necessarily a safe chimney. During extreme chimney cleaning, certified professionals complete detailed inspections using specialized camera systems lowered through the entire flue. These video inspections catch subtle hazards that flashlight checks miss:
-
Hairline cracks in terra cotta flue tiles.
-
Missing mortar joints between clay liners.
-
Rusted, warped, or improperly seating dampers.
-
Water leaks causing interior masonry spalling.
Detecting these hidden flaws prevents deadly carbon monoxide leaks and keeps rogue sparks from reaching house framing inside wall cavities.
Essential Safety Precautions and Inspection Standards
Safety must remain your highest priority whenever you handle home combustion systems. National fire codes set clear standards for maintaining home heating appliances safely.
Following NFPA 211 Guidelines
The National Fire Protection Association (NFPA) Standard 211 recommends that all chimneys, fireplaces, and vents be inspected at least once a year by a qualified professional. Even if you do not burn wood daily, birds, squirrels, and insects can build nests inside your flue over summer months, creating dangerous blockages that trap carbon monoxide inside your home when you start your first fire of the season.
Roof Safety Protocols
If you choose the top-down cleaning method, practice strict fall protection. Never walk on a steep or wet roof. Always wear non-slip rubber-soled footwear, use a properly anchored safety harness, and ensure your extension ladder extends at least three feet above the roof eave for safe mounting and dismounting.
Conclusion
Cleaning your chimney yourself is entirely possible when dealing with routine Stage 1 soot and straight flue configurations. By investing in proper poly brushes, extension rods, and HEPA filtration, proactive homeowners can maintain basic system efficiency safely. However, DIY sweeping cannot replace comprehensive professional inspections. When faced with heavy Stage 3 creosote, masonry cracking, or complex multi-flue systems, hiring a certified technician ensures your home remains thoroughly protected against devastating fires and toxic fumes throughout the heating season.
Frequently Asked Questions
How often should a chimney be cleaned?
Your chimney should be inspected at least once a year according to NFPA guidelines. Actual cleaning should take place whenever creosote buildup reaches 1/8 of an inch inside your flue liner.
Can I use a regular shop vac to clean chimney soot?
No. Standard shop vacuum filters are too coarse to trap micro-fine soot particles. Soot will pass straight through the filter and blow back out into your room, creating a mess and presenting health hazards. Always use a vacuum equipped with a true HEPA filter.
Do chimney cleaning logs actually work?
Chimney cleaning logs contain chemical additives that release mist when burned to dry out sticky Stage 2 creosote, causing it to flake off. While they help weaken residue, they do not replace manual sweeping or professional inspection.
How can I tell if my chimney has Stage 3 creosote?
Look into your flue using a strong flashlight. If the interior surfaces look shiny, smooth, and coated with a hard, black, tar-like glaze rather than soft powdery dust, you have Stage 3 creosote that requires professional removal.
What is the average cost of a professional chimney cleaning?
A standard professional chimney inspection and sweeping typically costs between $150 and $350, depending on your region, roof pitch, fuel type, and the amount of creosote accumulation.