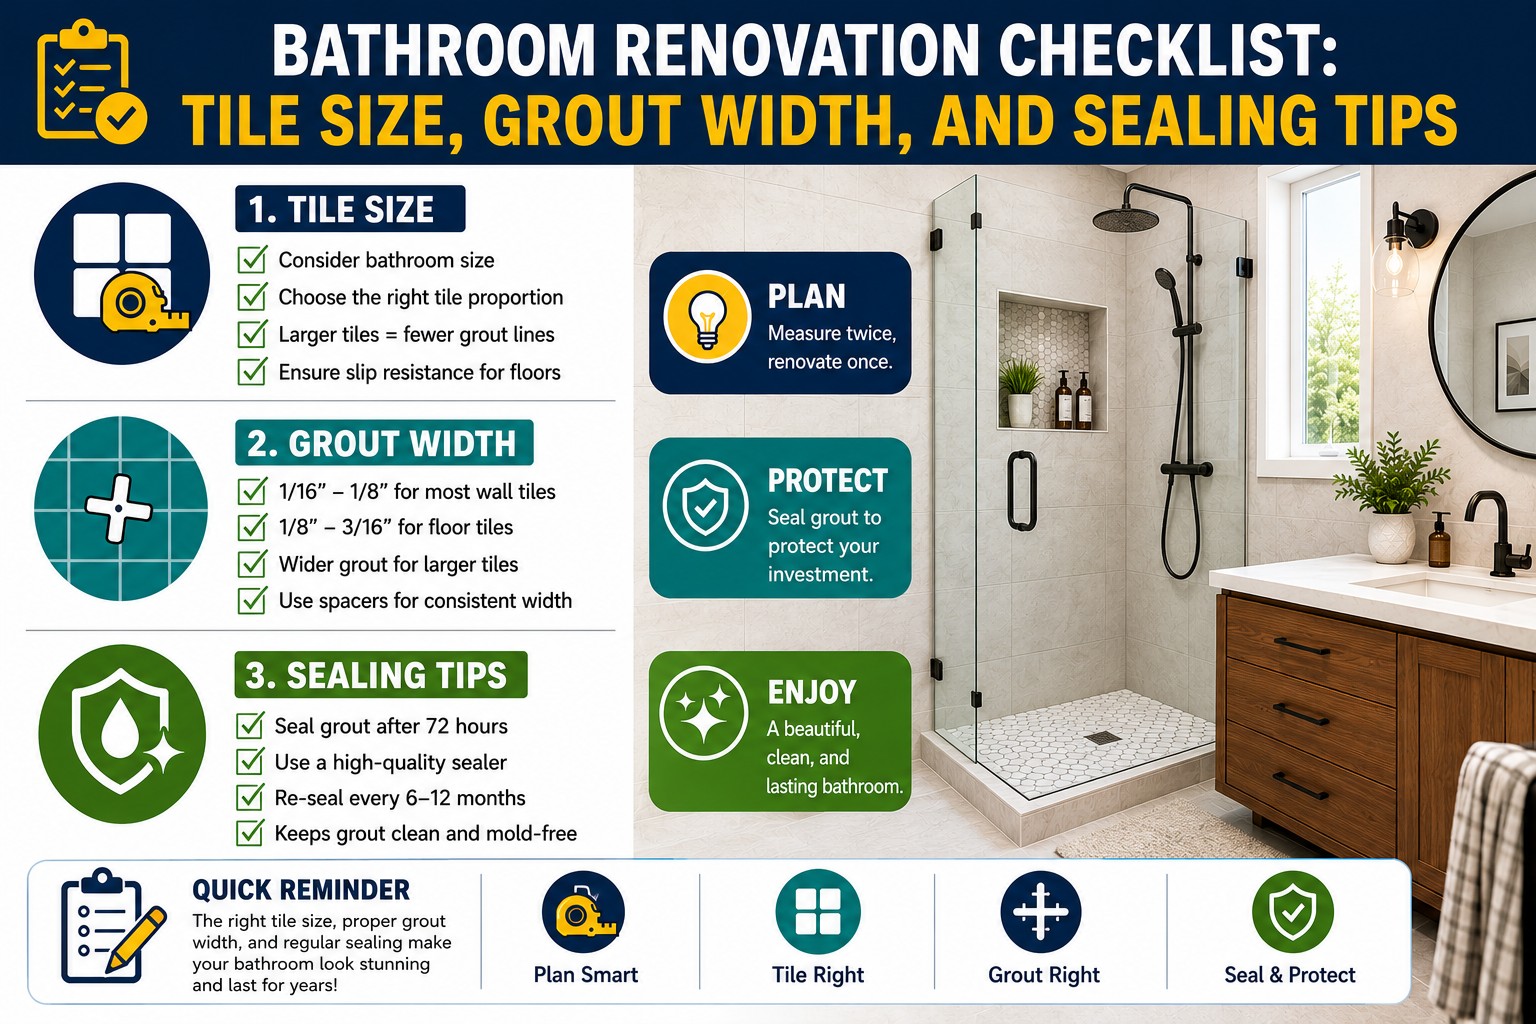
Renovating a bathroom looks simple on paper — rip out the old tile, put in new tile, done. But most of the decisions that decide whether your bathroom looks great in five years (or starts looking tired in five months) happen before a single tile goes on the wall. Tile size, grout width, and sealing are the three details homeowners skip past fastest, and they’re also the three that cause the most regret.
This checklist walks through everything to plan for, in the order you’ll actually need it, so you don’t find yourself mid-project realizing you picked the wrong spacer size.
1. Start With Tile Size — It Decides Everything Else
Tile size isn’t just a look you pick from a showroom board. It affects how much grout you’ll see, how the room feels, and how much maintenance you’re signing up for.
– Small mosaic tiles (1″–2″) — great for shower floors and accent walls, but mean a lot of grout lines. More grout means more cleaning.
– Standard tiles (12×12, 16×16) — the most common bathroom choice. Balanced grout coverage, easy to install, forgiving for DIYers.
– Large-format tiles (24×24 and up) — fewer grout lines, a cleaner modern look, but they need a flatter subfloor and more skill to set correctly.
Rule of thumb: the larger the tile, the more forgiving it is on cleaning long-term, but the less forgiving it is on installation. If your bathroom walls or floor aren’t perfectly flat, oversized tiles will show every dip.
2. Choosing Grout Width for Your Tile Size
This is the step most homeowners guess at, and it’s the one that changes both the look and the long-term maintenance of the room.
– Small tiles (mosaics, under 4″) — typically need wider joints, often 1/8″ or more, to allow for natural size variation.
– Standard tiles (12×12, 16×16) — this is where the classic debate comes up: 1/16″ vs 1/8″ spacing. Narrower joints give a tighter, more seamless look; wider joints are more forgiving during installation and easier to keep clean because there’s more surface for the grout float to press into.
– Large-format tiles — usually need a minimum 1/8″ joint, sometimes more, to handle expansion and contraction without cracking.
If you’re specifically deciding between 1/16″ and 1/8″ spacing for 16×16 tile, it’s worth checking a dedicated comparison before you buy spacers — the right call depends on how straight your walls are and how much grout line you actually want visible.
3. Don’t Skip Grout Color Planning
Grout color changes the entire personality of a tile job. Matching grout to tile color creates a seamless, larger-looking surface. Contrasting grout (dark grout with white tile, for example) highlights the tile pattern but shows every stray smear during installation and every bit of grime afterward. Lighter grout looks clean when new but stains faster in high-moisture bathroom areas unless it’s sealed properly.
4. Pick the Right Grout Type
Not all grout behaves the same way in a wet room.
– Sanded grout — best for joints 1/8″ and wider; the sand adds strength and reduces shrinkage/cracking.
– Unsanded grout — better for narrow joints under 1/8″, since sand grains can be too large to pack in cleanly.
– Epoxy grout — more expensive but far more water- and stain-resistant, a strong option for shower floors and areas with constant moisture exposure.
5. Sealing — The Step That Determines Whether Any of This Lasts
Grout is porous. Without sealing, it absorbs water, soap scum, and body oils, which is exactly why grout lines turn gray or moldy over time, even with regular cleaning.
When to seal: Wait at least 48–72 hours after grouting before applying sealer, giving the grout time to fully cure. Sealing too early traps moisture underneath.
How often to reseal: Most penetrating sealers need reapplication every 12–18 months in a bathroom, since shower areas see far more water exposure than a kitchen backsplash. High-traffic showers may need it closer to the 12-month mark.
What to use: Penetrating (impregnating) sealers are the standard choice for bathroom grout — they soak into the grout rather than sitting on top, so they don’t peel or wear off unevenly the way topical sealers can.
Epoxy grout exception: If you went with epoxy grout, you can skip sealing altogether — it’s non-porous by nature.
6. Waterproofing Behind the Tile
Sealing the surface only protects half the equation. Before tile ever goes up in a shower, the substrate needs a proper waterproof membrane (sheet membrane or liquid-applied) behind it. Skipping this step is one of the most common — and most expensive — bathroom renovation mistakes, since problems don’t show up until months later when water has already worked its way into the wall structure.
7. Plan for Slope in Shower Floors
Shower floors need a slope of roughly 1/4″ per foot toward the drain. Get this wrong and water pools instead of draining, which accelerates grout breakdown and creates a standing-water environment for mold no matter how well you sealed.
8. Final Pre-Tile Checklist
– Subfloor and walls are flat and level (especially important for large-format tile)
– Waterproof membrane installed and inspected before tiling starts
– Tile size and grout width decided together, not separately
– Grout type matched to joint width (sanded vs. unsanded vs. epoxy)
– Grout color sampled next to actual tile, not just on a swatch card
– Sealer purchased in advance so it’s ready once curing time is up
– Shower floor slope confirmed before setting tile
Frequently Asked Questions
What is the best grout width for a bathroom floor?
For standard 12×12 or 16×16 floor tile, 1/8″ is the most common choice because it’s forgiving during installation and easier to keep clean. Narrower 1/16″ joints look more seamless but require very precise tile and a flatter substrate.
How long should I wait to seal grout after installation?
Wait at least 48–72 hours after grouting so the grout fully cures before sealing. Sealing too soon can trap moisture underneath the surface.
Does large-format tile need more or less grout maintenance?
Less, generally. Fewer grout lines mean less surface area for grime and mildew to build up. The tradeoff is that installation is less forgiving, so hiring an experienced installer matters more.
Can I skip sealing if I use epoxy grout?
Yes. Epoxy grout is non-porous, so it doesn’t need a separate sealer the way cement-based grout does.
How often should bathroom grout be resealed?
Every 12–18 months is typical for shower and wet-area grout, given the constant water exposure. Lower-moisture areas like a bathroom floor away from the shower can sometimes stretch longer between resealing.
Is 1/8 grout line too small for DIY installation?
No — 1/8″ is actually one of the most DIY-friendly grout widths. It’s forgiving of minor tile size variation and slightly uneven spacing, making it easier for first-timers to get clean, consistent lines compared to narrower 1/16″ joints.