polish wax on the car
If you have ever stood in your driveway wondering why your paint looks flat even right after a wash, the answer is usually protection, not cleaning. Wax puts a thin shield between your clear coat and everything the road throws at it. Detailers like Avion Detailing LLC see the difference a proper wax job makes on cars that face harsh seasons every year. This guide shows you how car waxing in White Bear Lake MN works at home, from prep to the final buff. Follow the steps in order and you will get a deep, even shine without wasting product or time.
Why Waxing Is Worth Your Time
Think of wax as sunscreen for your car. Paint is covered by a clear coat that fades, etches, and dulls when it meets UV rays, bird droppings, tree sap, and road salt. A coat of wax takes that wear first, so the clear coat stays intact. It also makes water bead and roll off, which keeps the car cleaner between washes. From my own garage experience, a waxed car takes half the effort to wash. That is why car waxing in White Bear Lake MN is so popular with drivers who deal with long, harsh winters. The job takes about an hour once you know the routine, and results can last weeks or months depending on the product.
Gather the Right Supplies
Choose a Wax That Fits Your Routine
Carnauba paste gives a warm glow but wears sooner. Synthetic sealants last longer and spread easily. Ceramic-infused sprays are fast and forgiving for beginners. Pick the one that matches the time you want to spend, and read the label for cure times.
Applicators and Towels
You need foam applicator pads, at least three clean microfiber towels, and a bucket with car shampoo. Cheap or dirty towels leave scratches, so keep them washed and separate from kitchen rags.
Wash and Dry the Car Properly
Never wax a dirty car. Park in the shade and let the panels cool, then rinse from the top down to loosen dust and road film. Wash with a pH-balanced shampoo using two buckets, one for soap and one for rinsing the mitt, so grit does not get dragged across the paint. Rinse well, including door jambs and mirrors, and dry with a plush microfiber towel. Water left to dry on its own leaves mineral spots that wax will simply seal in.
Prepare the Paint Surface
Test With the Baggie Trick
Slip your hand into a thin plastic bag and glide it over the clean hood. If you feel grit, bonded contamination is present. A clay bar with lubricant lifts it off and leaves the paint smooth.
Polish Only If You Need It
Light swirls and dullness can be improved with a mild polish before waxing. Polish corrects and wax protects, so do them in that order. Skip this step if the paint already looks clear and glossy.
Protect Trim and Seals
Black plastic and rubber stain easily with wax residue. A strip of painter’s tape along the edges saves a lot of cleanup later.
Apply the Wax Step by Step
Work in Small Sections
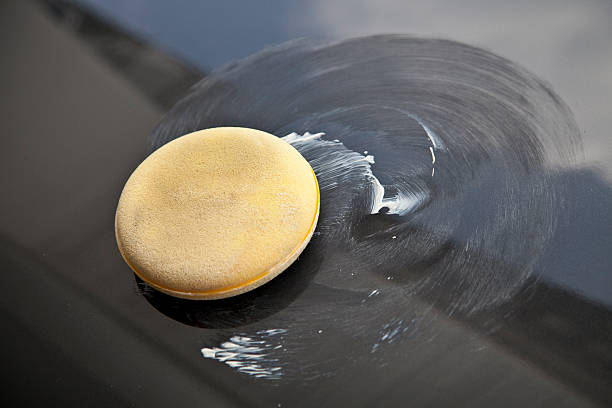
Divide the car into panels, such as the hood, roof, and each door. Put a small amount of wax on the pad and spread a thin, even coat in overlapping passes. A thin layer cures better and buffs off more easily than a thick one. More product does not mean more protection. It only makes your job harder.
Respect the Haze Time
Most waxes need a few minutes to dry to a light haze. Check the label, then test with a quick finger swipe. If it wipes clean and leaves no smear, it is ready. Waiting too long makes buffing tough, so work panel by panel. Patience at this stage is what separates a good finish from a streaky one.
Buff and Inspect Your Work
Fold a clean microfiber towel into quarters and wipe the haze away with light pressure. Flip to a fresh side often so you do not drag residue around. Step back and check each panel from different angles under good light, since streaks show best in sunlight. Pay attention to emblems, grilles, and panel edges where wax likes to hide. A final pass with a dry, clean towel brings out the depth.
Keep the Shine Going Through Minnesota Seasons
Wash Gently and Often
Wash every week or two with a soft mitt and a gentle shampoo. Harsh detergents strip wax early. Rinse bird droppings and sap quickly, because they etch paint if left in place.
Prepare for Salt and Snow
Wax in autumn so the finish is fresh before road salt arrives, and rinse the lower panels during winter thaws. When people ask how often to repeat car waxing in White Bear Lake MN, a refresh each spring and fall works well for most vehicles.
Final Thoughts
Waxing is a small habit that pays off in a car that looks sharper and stays protected longer. With a little patience, car waxing in White Bear Lake MN becomes an easy routine you can repeat every season, and your paint will thank you for it.
Frequently Asked Questions
How long does car waxing take?
A full car usually takes between 45 and 90 minutes, including drying and buffing. New users should expect to move slower at first. Working in small sections keeps you from rushing. Curing times vary by product, so always check the label.
Can I wax my car in cold weather?
Most waxes work best between about 50 and 80 degrees Fahrenheit. In colder weather, use a garage or wait for a milder day. Cold paint slows drying and makes buffing harder. Some spray products handle cool temperatures better, so read the directions first.
How often should I reapply wax?
Most drivers reapply every two to four months. When water stops beading on the surface, it is a good sign the layer is thinning. Cars parked outdoors or driven on salted roads may need coats more often. Sealants usually last longer than natural wax.
Do I need to polish before waxing?
Not always. If the paint is smooth and glossy after washing and claying, you can go straight to wax. Polish helps when you see swirl marks or dullness. Remember that wax protects the paint but does not remove scratches.